

With the release of Microsoft Office 2010, Microsoft stopped using the traditional MSI installer for its Office programs installation and released a new installer called C2R Installer which stands for Click-to-Run installer.
One disadvantage of Click to Run installer is that it does not allow you to select what Office programs to install on your PC. Which means, the installer will download and install all the Microsoft Office programs whether you want them or not.
So, if you want to install only a few of Office programs such as Outlook, Word and PowerPoint but don’t want to install Access and other programs then that is not possible by default.
However, you can still customise click-to-Run installer options using an official Microsoft tool called “Office Deployment Tool“. Using this tool, you can force the installer to install only selected Microsoft Office programs without having to install all the office programs on your PC.
The tool is available for Microsoft Office 2013 and 2016, so the tool should work fine if you are using these versions of Microsoft Office on your PC.
What this tool does is it allows you to download the Microsoft Office files in your desired location and also allows you to customise the office programs that you want to install.
So, you can install the Microsoft Office programs of your choice and leave everything else that you don’t need and keep your PC clean. There are other few options offered by this tool, which you will read later in the post.
Now if you want to customise Office setup and want to install only selected office programs from the C2R (Click-to-Run) tool, follow these steps given below.
Customise Office 2016/365 Setup to Install Selected Programs
Begin with downloading the Microsoft Office deployment tool for Click-to-Run. As I said earlier, the tool is available for both the Office 2013 and Office 2016 versions.
Now you have to run and extract the tool on your PC. Run the downloaded file. If it asks to select a folder to extract the files, select any folder of your choice. Just make sure it is easier to access and you don’t keep searching the location when needed.
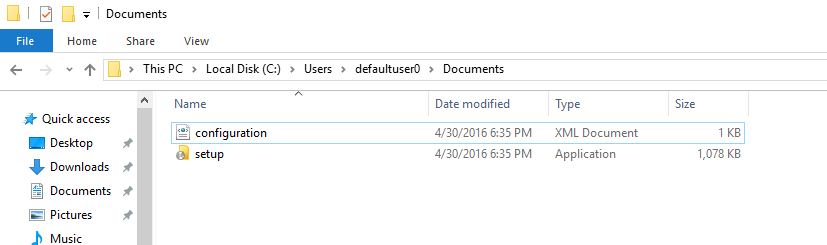
After extracting the file, it will create two files in the folder namely:
configuration.xml and setup.exe.
Now what we have to do is edit the configuration.XML file. It is the main file which you can use to tell the Microsoft Office installer about what programs you want to install, in which language and what programs to exclude.
Editing this file will force the office installer to install office programs according to your choice along with your preferences.
You can use the Notepad to edit this file as it is in .xml format. To edit the file, right-click onconfiguration.xml and select Edit. It will open the XML file in Notepad editor.
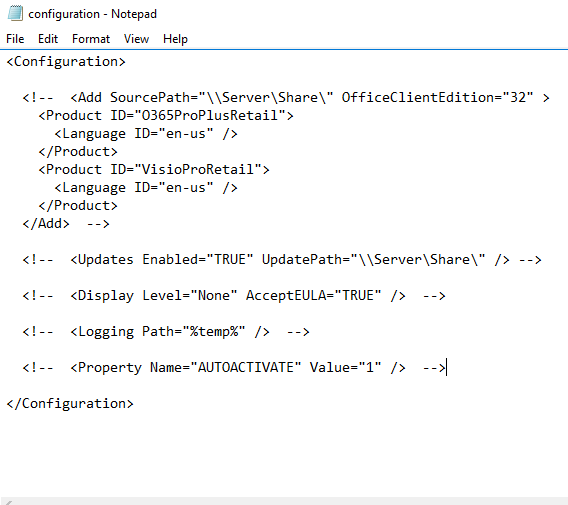
By default, the file contains very basic information about the setup that you can edit and save according to your preference. It will look something like this:
<Configuration>

<!-- <Add SourcePath="\\Server\Share\" OfficeClientEdition="32" >
 <Product ID="O365ProPlusRetail">
 <Language ID="en-us" />
 </Product>
 <Product ID="VisioProRetail">
 <Language ID="en-us" />
 </Product>
 </Add> -->

<!-- <Updates Enabled="TRUE" UpdatePath="\\Server\Share\" /> -->

<!-- <Display Level="None" AcceptEULA="TRUE" /> -->

<!-- <Logging Path="%temp%" /> -->

<!-- <Property Name="AUTOACTIVATE" Value="1" /> -->

</Configuration>
In the above code, you can change several things such as:
SourcePath = this is where the office setup files downloaded by the C2R installer will be saved. So you can keep the default source path or change it C:/ or E:/ (D:/) path of your choice.
OfficeCleintEdition = You can change the Office version to 32-bit or 64-bit as per your need.
Product ID= Here product ID is not product key but the variant of Office suite you want to install. By default, it is set to 0365ProPlusRetail, but you can change it to following:
ProPlusRetail
HomeStundetRetail
HomeBussinesRetail
etc.
Langauge = You can change the language which is set to US English by default. Setting it to hi-in will download Hindi India version of Office suite.
ExcludeApp ID = This the major part of this file. Adding the name of the program after ExcludeApp ID variable will not install that office program on your PC. More about this later in the article.
Now, we will edit the configuration.XML file to exclude unwanted Office programs from installation. Here is how to do it.
Install Select Office Programs only
Here you cannot select which program to install, but you can select which programs you don’t want to install. So, all you have to do is include the name of the program that you don’t want to install along with “Exclude” variable as shown below.
Example: If you don’t want to install Access andGroove Office programs on your PC, then type these two lines of code in the file.
<ExcludeApp ID=”Access” />
<ExcludeApp ID=”Groove” />
<ExcludeApp ID=”Groove” />
Now do this for all the programs that you want to exclude from office installation, and save the file by pressing Ctrl + S.
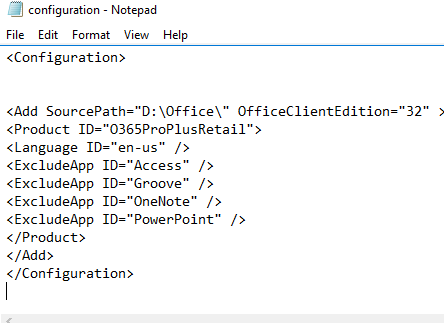
After editing the file, it will look something like this:
<Configuration>


<Add SourcePath="D:\Office\" OfficeClientEdition="32" >
<Product ID="O365ProPlusRetail">
<Language ID="en-us" />
<ExcludeApp ID="Access" />
<ExcludeApp ID="Groove" />
<ExcludeApp ID="OneNote" />
<ExcludeApp ID="PowerPoint" />
</Product>
</Add>
</Configuration>
You can replace your original configuration.XML code with the code given above. You can copy and paste it as it is. Add any program name that you want to exclude from Office setup and save the file.
I have removed other unnecessary code from the file, so you don’t have worry about that.
Download Office Setup Files
Once you have saved the edited .xml file, it is time to download the full office setup file using the setup.exe file that you got after extracting the Deployment file. However, simply don’t run the setup.exe file by double clicking on it as it will not work.
You have to run the setup file from the command prompt to make it work. So here is how to do it.
Navigate to the location where you have extracted the configuration.xml and setup.exe file. While inside the folder, press and hold Shift Key and right-click on an empty area inside the folder.
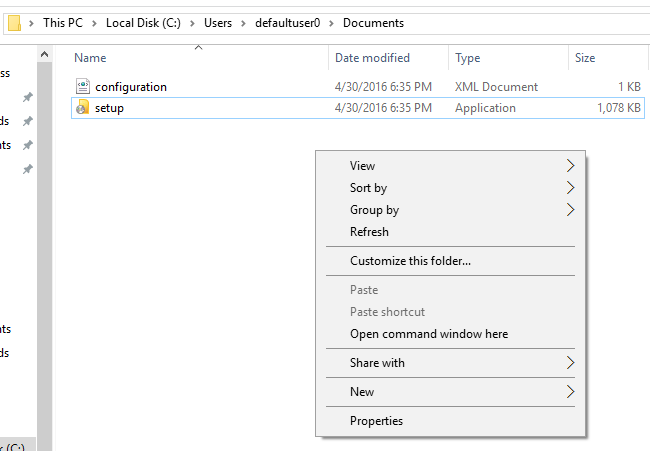
Select “Open Command window here” option. It will open command prompt window with the current directory active. In the command prompt window type the following command and hit enter.
setup.exe /download Configuration.xml
If everything went right, the setup.exe file will begin downloading the Office setup files.
A new folder called “Office” will be created by the installer in the directory that you had set in the configuration.XML file as “Sourcepath” while editing the file. If you navigate to that folder, you will see the downloaded Office setup files saved in the folder.
The downloading process will take some time depending on your internet connection. So, wait till the files are downloaded completely. As soon as the download will finish, the command prompt window will return to the current directory.
Install Office 2016/365 with Selected Programs
Now that you have downloaded the Office setup file, it is time to install it. During the installation, we will use the configuration.XML file again so that excluded programs in the file don’t get installed on your PC.
In the command prompt, run the following command and hit enter:
setup.exe /configure configuration.xml
Now the command will execute and start installing Microsoft office 2016/365 or 2013 on your PC. Wait till it installs it completely, then you can set up the Office with your login details and product key

No comments:
Post a Comment